
 0
0
 0
0
Kitchen backsplashes and countertops sit only inches apart, but they collect different kinds of residue.
A countertop catches crumbs, spills, food preparation residue, and whatever gets placed directly on it. A backsplash deals more with fine grease droplets, steam, sauce splatter, and residue that dries against a vertical surface before anyone notices it.
The materials can differ too.
One kitchen may have a quartz counter beneath ceramic tile and grout. Another may pair stone counters with painted drywall, glass, metal, or a decorative mosaic. A cleaner that works well on the counter may be unsuitable for the wall directly behind it.
That is why backsplash cleaning should begin with two questions: what is the surface made from, and what type of buildup is actually sitting on it?
Backsplash Grime Develops Differently From Countertop Mess
Countertop spills are usually obvious.
A coffee ring, crumbs from food preparation, or a splash near the sink is easy to see because it sits on a broad horizontal surface.
Backsplash buildup can develop more quietly.
Fine cooking grease rises from pans and settles on the wall. Steam carries small amounts of residue upward. Tiny sauce droplets dry before they are noticed.
Dust may then stick to the oily film.
The result can be a backsplash that looks acceptable from across the kitchen but feels slightly tacky when touched.
That slow buildup is one reason a quick counter wipe does not necessarily tell you anything about the condition of the wall behind it.
Identify the Backsplash Material Before Choosing a Cleaner
Do not treat “backsplash” as one material category.
Common surfaces include:
- Ceramic tile
- Porcelain tile
- Grout
- Glass
- Natural stone
- Stainless steel
- Other finished metals
- Painted drywall
- Laminate or composite panels
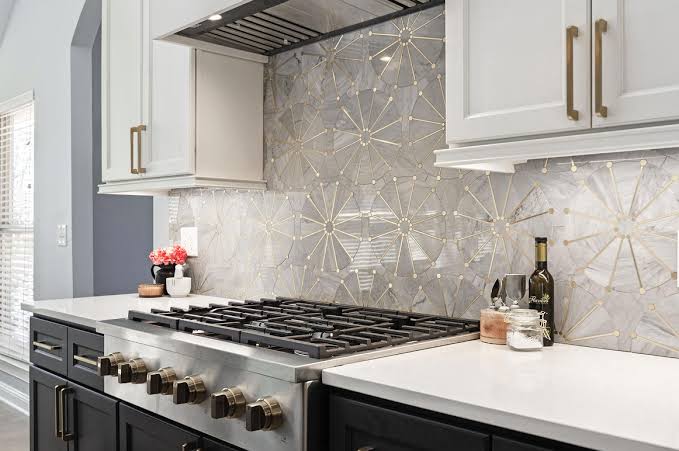
- Decorative mosaics
Each may react differently to acids, abrasives, moisture, degreasers, and scrubbing tools.
Check manufacturer or material-care guidance where available.
If the surface is unfamiliar, test a proposed method in a small inconspicuous area before applying it across the entire wall.
A backsplash can be cleaned again. A dulled stone finish, scratched metal panel, or damaged paint may require repair.
Start by Reading the Cooking Pattern
The section behind the stove usually experiences the heaviest grease exposure.
Begin there, but do not assume the same buildup continues across the entire backsplash.
Inspect the area directly behind the burners, then compare it with sections beside the stove, behind small appliances, and farther along the counter.
You may find heavy grease close to the cooking zone, lighter film several feet away, and almost no oily residue near the opposite end.
That pattern should determine where stronger grease removal is actually necessary.
There is little reason to use the same product and effort on a lightly dusty section that you would use on a greasy cooking splash zone.
Let the Residue Type Decide the First Step
Not every mark on a backsplash needs the same treatment.
Fresh sauce splatter may respond to a simple wipe.
Older grease may require an appropriate product and some label-directed contact time.
Dust sitting on top of oily residue may need to be removed carefully before the grease underneath can be addressed.
Dried food spots can require softening rather than aggressive scraping.
Identify the residue before increasing pressure or changing products.
If Alto Cleaning Services is scheduled for the kitchen, visible problems such as cracked grout, peeling caulk, damaged paint, or loose trim are better identified separately so repair issues are not mistaken for stubborn cleaning problems.
That distinction protects both the surface and the cleaning scope.
Give Grease Time to Release
Grease can tempt people to scrub harder when the first wipe does not work.
More pressure is not always safer.
Use a product appropriate for the backsplash material and follow its directions, including any recommended dwell or contact time.
Allowing the product to loosen oily residue can reduce the amount of force required.
Then wipe with a soft cloth or non-abrasive tool suited to the finish.
Several controlled passes are often preferable to one aggressive attempt.
This matters around decorative tile, painted surfaces, coated metals, and finishes that can lose sheen under heavy rubbing.
Treat Tile and Grout as Two Different Surfaces
Tile and grout sit together, but they do not necessarily clean the same way.
Smooth ceramic or porcelain tile usually releases surface residue more easily.
Grout is more textured and can hold discoloration, grease, and dried splatter within its surface.
Inspect both independently.
A product appropriate for the tile may not always be the best choice for the grout, particularly where sealers or specialty finishes are involved.
Use soft tools and avoid excessive scrubbing pressure.
If grout is cracked, crumbling, missing, or separating from the tile, stop treating the condition as dirt.
Cleaning can remove buildup. It cannot restore damaged grout.
Check the Lower Grout Lines Near the Counter
The grout closest to the countertop often receives a different type of exposure from the grout higher on the wall.
Water droplets, crumbs, food residue, and cleaner overspray may collect near the lower edge.
Inspect this area separately from the main cooking zone.
A lower grout line beside the sink may show water-related residue, while one beside the stove may carry grease.
That difference matters when deciding how to clean it.
The backsplash does not have one uniform environment simply because all the tiles belong to the same installation.
Glass Needs a Separate Finishing Step
Glass backsplashes can reveal residue that other surfaces hide.
Grease is visible.
Cleaner film is visible.
Water marks are visible.
Streaks appear as soon as light hits the wall from the side.
Remove the actual grease first with a product suitable for the glass.
Then use a clean microfiber cloth for the finishing pass.
Do not keep adding more product simply because the surface looks hazy.
Too much cleaner can leave its own film.
Check the result from an angle after the glass dries. Side lighting often reveals whether the remaining haze is grease, moisture, or cleaning residue.
Natural Stone Changes the Rules
Stone requires more caution than ordinary ceramic tile.
Certain acids and strong cleaners can etch, dull, or discolor some stone surfaces.
Use products intended for the specific material and follow available care instructions.
Avoid saturating seams.
If the installation has been sealed, follow the recommended care for that system rather than assuming every stone backsplash should be treated the same way.
A greasy spot may be removable, but the cleaning method should never create a permanent dull patch around it.
Material identification matters more here than cleaning strength.
Map Every Material Change Before Cleaning the Whole Wall
Some backsplashes change material several times within a few feet.
Tile may meet grout, then a stainless-steel panel behind the range, then painted wall near the counter edge. Electrical plates interrupt the surface, caulk appears along the bottom, and a stone accent may sit in the middle.
Treat those transitions like borders on a map.
A kitchen scheduled for cleaning services atlanta is easier to approach when those material breaks are identified before products come out. One section may tolerate a grease-cutting method, another may require stone-safe care, and the area around an outlet needs controlled moisture rather than the same treatment used on the tile beside it.
The wall may look continuous, but the cleaning method should change each time the material changes.
That is a very different problem from wiping one uniform countertop from end to end.
Metal Backsplashes Need Control More Than Pressure
Stainless steel and other metal panels can collect cooking grease while also showing fingerprints, streaks, and water marks.
Use a product appropriate for the finish.
Where manufacturer guidance specifies a wiping direction, follow it.
Avoid abrasive pads that can leave scratches.
Drying the surface after cleaning can help prevent visible droplets from forming marks.
Pay close attention to seams and edges, but do not force liquid into openings.
Metal may appear durable, yet a scratched or altered finish can be far more noticeable than the grease that prompted the cleaning.
Painted Walls Require the Gentlest Judgment
A painted backsplash area may respond very differently from tile.
Begin with a mild approach and a soft cloth.
Test cautiously if the paint finish is uncertain.
Flat or matte paint can develop shiny patches when rubbed aggressively.
Older paint may also be more sensitive to moisture.
If grease has stained or penetrated the finish, repeated cleaning may stop producing improvement.
At that point, repainting or touch-up may be more appropriate than continuing to scrub.
The stopping point matters just as much as the starting method.
Treat the Counter-to-Backsplash Seam as Its Own Detail
The narrow joint where the wall meets the countertop often catches residue that neither broad-surface cleaning fully removes.
Crumbs, grease, water, and cleaner film can gather along this line.
Use a soft cloth or appropriately sized tool to reach the seam without digging into caulk or grout.
Avoid blades or sharp scraping tools.
If caulk is cracked, peeling, mold-damaged, or separating, cleaning alone will not restore the joint.
That belongs in the maintenance category.
A clean seam should look finished without being physically disturbed.
Move Small Appliances Before Judging the Wall
Coffee makers, toasters, mixers, air fryers, and other countertop appliances can hide sections of backsplash for months.
Where safe and practical, unplug and move lightweight units before cleaning behind them.
Check both the wall and the counter beneath.
You may find grease on the backsplash, crumbs below the appliance, and dust along the cord area.
Clean the appliance exterior according to its own care instructions before returning it.
This prevents hidden buildup from being left between otherwise finished sections of the wall.
Keep Electrical Plates Out of the Wet-Cleaning Pattern
Outlets and switches interrupt many backsplash installations.
They should not be treated like tile.
Never spray cleaner directly onto an electrical plate or opening.
If the exterior plate requires wiping, apply a controlled amount of suitable product to the cloth rather than the fixture.
Keep moisture away from openings and seams.
Grease immediately surrounding an outlet can be handled on the backsplash surface while the electrical component remains a separate, low-moisture detail.
A continuous wall does not require a continuous spray pattern.
Work Downward Only After the Upper Sections Are Finished
Once the correct methods have been chosen, clean the backsplash in an order that prevents repeat work.
Begin with the upper wall sections and move downward.
Cleaner and loosened residue can travel toward the counter as you work.
Finishing the counter first may simply mean wiping it again later.
After the backsplash is complete, handle the countertop, sink area, and finally the floor if debris has fallen.
This is especially useful in kitchens with decorative molding, open shelving, or upper surfaces directly above the backsplash.
Gravity should determine the sequence.
Keep Greasy Cloths Away From Finishing Cloths
One cloth can become overloaded quickly in the cooking zone.
Once saturated with grease, it may redistribute residue rather than remove it.
Separate the main removal stage from the final wipe.
A cloth used behind the stove should not automatically become the finishing cloth for clean glass or a lightly soiled section farther away.
Switch cloths when they stop lifting residue effectively.
On reflective surfaces, a fresh final cloth can make the difference between a clean wall and one covered in cloudy smears.
Check for Product Film Before Recleaning the Grease
A backsplash may still feel tacky after the visible grease is removed.
That does not always mean grease remains.
Some cleaning products leave residue when overapplied or when a required finishing step is skipped.
Follow label directions for rinsing or final wiping.
Use clean material for that stage.
Then let the surface dry before judging it.
If the tackiness disappears after the cleaner residue is removed, further degreasing would have been unnecessary.
This keeps the diagnosis accurate and reduces repeated chemical exposure on the finish.
Do Not Carry the Countertop Cleaner Up the Wall Automatically
Convenience often leads to one product being used on both surfaces.
That is only appropriate when the product is actually compatible with both materials.
A stone counter may sit below ceramic tile.
A laminate counter may meet painted drywall.
A quartz surface may sit beside metal.
Read labels and care information before extending one product from the horizontal surface to the vertical one.
Physical distance does not determine material compatibility.
The two surfaces may touch while requiring completely different care.
Record the Difficult Material for the Next Cleaning
Once the backsplash is finished, note which section required the most caution.
Perhaps the glass showed cleaner film easily.
Maybe the stone accent required a specific product.
The grout near the range may have held grease longer than the tile.
That information can save guesswork later.
A brief material note also gives Alto Cleaning Services a clearer reference point during a future kitchen visit without requiring every backsplash section to be treated as though it has the same finish or the same buildup.
The next cleaning can start with what is already known rather than repeating the material-identification process from zero.
Use the Cooking Zone as an Early-Warning Area
The backsplash does not need a full detail clean every time the kitchen is wiped.
Instead, occasionally inspect a small section closest to the stove.
If that area still feels clean, distant sections are unlikely to require heavier grease work.
If it has begun developing a tacky film, address it before dust bonds to the residue and makes the job harder.
This gives the backsplash its own maintenance signal rather than tying it to the countertop schedule.
Countertops may need daily care.
The backsplash usually follows a slower buildup pattern.
The Backsplash Is a Wall Surface, Not an Upright Countertop
Backsplashes and countertops share a kitchen, but they do not experience the room in the same way.
Counters receive direct spills, crumbs, containers, and food preparation.
Backsplashes collect airborne grease, dried splatter, steam residue, and material-specific buildup across tile, grout, glass, metal, stone, paint, seams, and electrical interruptions.
That difference should shape the cleaning method.
Identify the material first. Read the residue pattern. Give grease time to loosen instead of relying on pressure. Treat grout, stone, glass, metal, paint, caulk, and electrical plates according to what they actually are.
Then finish in an order that prevents drips and debris from creating repeat work below.
The backsplash becomes much easier to maintain once it stops being treated as a countertop that happens to be standing vertically.


Author Profile

- CEO NGSC Sports
Latest entries
 AFCOctober 23, 2026NFL Thursday Night Football: Caleb Williams Outduels Drake Maye as Bears Hold Off Patriots 30-24
 NBAOctober 23, 2026NBA Recaps: Comeback Magic in Philly and Thunder Defense Highlight Wild Thursday Slate
 NFLOctober 23, 2026NFL Trade Deadline Rumors: Multiple Teams Eyeing Colts Star Running Back Jonathan Taylor
 WNBAOctober 22, 2026Dominant Angel Reese, Atlanta Dream Blitz Golden State Valkyries 95-71 to Take 2-1 WNBA Finals Lead
About the Author